ADVERTISEMENT
Over 80% of Americans think gardening helps relax and boosts mental well-being. If you love growing plants, making a wood planter box could be your next fun project. It’s not just an enjoyable activity. It lets you craft a box that fits your space and style perfectly.
It doesn’t matter if you’re skilled or just starting with DIY. This project is great for making your outdoor space beautiful. Plus, you get the calming effects of gardening. Let’s find out why creating your own wood planter box is easy and fulfilling!
Key Takeaways
- Building a wood planter box is a fulfilling DIY project that can improve outdoor aesthetics.
- Personalize your planter box to fit your unique design preferences and gardening needs.
- This project is accessible for both beginners and seasoned DIY enthusiasts.
- Gardening has significant mental health benefits, according to studies.
- A DIY wood planter allows you to choose size and materials that suit your garden.
Introduction to Wood Planter Boxes
Making your own wooden planter boxes is a fun and rewarding DIY project. You can add personal touches that store-bought planters often miss. This guide will show you how to build a planter for flowers or herbs.
ADVERTISEMENT
Benefits of DIY Planter Boxes
DIY planter boxes have many advantages. Creating your own can be cheaper than buying one. You can pick materials and designs that fit your budget and garden perfectly. This allows you to make planters in any shape and size for your plants.
- Cost Savings: Making your planter is often less expensive than one from a store.
- Creativity: You get to design a planter that matches your style and garden space.
- Satisfaction: There’s a special pride in finishing a planter box project yourself.
Choosing the Right Wood
Selecting the right wood is crucial for a durable and good-looking planter. Cedar and redwood are great because they resist decay, perfect for outdoors. Knowing about different woods will help make your planter last longer and look better.
Essential Tools for Your DIY Project
Building a wood planter box requires various tools. Knowing the essential tools for DIY projects makes work easier, letting you be creative. With the right tools, making a wood planter box is simpler and the result is better.
Must-Have Hand Tools
For your wood planter box project, certain hand tools are key. These include:
- Tape Measure – Accurate measurements are vital for any DIY project.
- Handsaw – Perfect for cutting wood to the right size.
- Screwdriver – Needed to put parts together firmly.
- Chisel – Good for detailed work and shaping wood.
- Square – Makes sure the box has right angles.
Power Tools to Consider
For efficiency, power tools greatly speed up your project. Recommended power tools for your wood planter box are:
- Miter Saw – Ideal for precise cuts and angles.
- Drill – A must-have for making pilot holes and using screws.
- Jigsaw – Excellent for cutting curves and detailed patterns in wood.
- Orbital Sander – For a smooth finish on wood surfaces.
- Router – Great for decorative edges and grooves.
Selecting the Perfect Location for Your Planter Box
Choosing the right spot for your planter box is key to a healthy garden. You must think about the light and how easy it is to get to your box. Getting the right mix of sunlight and shade is crucial for plants to grow well.
Sunlight and Shade Considerations
Plants need different amounts of sunlight. Paying attention to how much sun plants need is important. Most need 6 to 8 hours of sunlight a day. Yet, some need shade to avoid harm. Look for places that get sun and shade during the day. If you’re not sure, watch how the sun moves over your area.
Access and Visibility Factors
It’s best to place your boxes where they’re easy to reach for watering and upkeep. Having them in view not only looks good but also reminds you to take care of them. Pick a spot where your planters are easy to get to. They should not be in the way of other things. Planters that you can see add beauty and interest to your space.
| Factor | Considerations |
|---|---|
| Sunlight | 6-8 hours daily for most plants; balance with shade where necessary. |
| Accessibility | Ensure easy access for watering and maintenance. |
| Visibility | Enhance aesthetic appeal and promote regular care. |
Basic Wood Planter Box Designs
Building a wood planter box is fun and rewarding. There are many basic designs. They meet different gardening needs and styles.
Rectangular Planter Boxes
Rectangular planter boxes are great for narrow spaces. They’re perfect for patios, balconies, or walkways. These boxes hold many plants, helping them grow well.
Their long shape looks nice outdoors.
Square Planter Boxes
Square planter boxes grab attention in gardens or yards. They fit snugly in corners or stand out alone. They are good for small plants or herbs, making care and harvesting simple.
Vertical Planter Boxes
Vertical planter boxes are great for saving space, especially in cities. They use upright space well, for many plants. They bring depth and height to gardens, liked by creative gardeners.
Measuring and Cutting Wood
Getting the measurements right is key for sturdy planter boxes. Using good measuring techniques helps hit the right dimensions. Before measuring, keep in mind: “measure twice, cut once.” This will save you from mistakes and make sure your cuts are spot on.
Proper Measurement Techniques
To start, figure out your planter box’s needed dimensions. For precise readings, use a tape measure and a square. Write down your measurements either in a notebook or on your phone to keep them handy. Here are tips for woodworking measurements:
- Use a framing square for perfect right angles.
- Make your marks clear on the wood to prevent cutting mistakes.
- Always double-check your measurements to avoid errors.
Cutting Methods for Different Woods
The cutting method varies depending on your wood choice. Use a miter saw for hard woods like oak or maple for a neat finish. For softer woods, such as pine, use a circular saw or table saw. Always wear safety gear when cutting. Stick to your measurements closely for the best results.
Assembling Your Planter Box
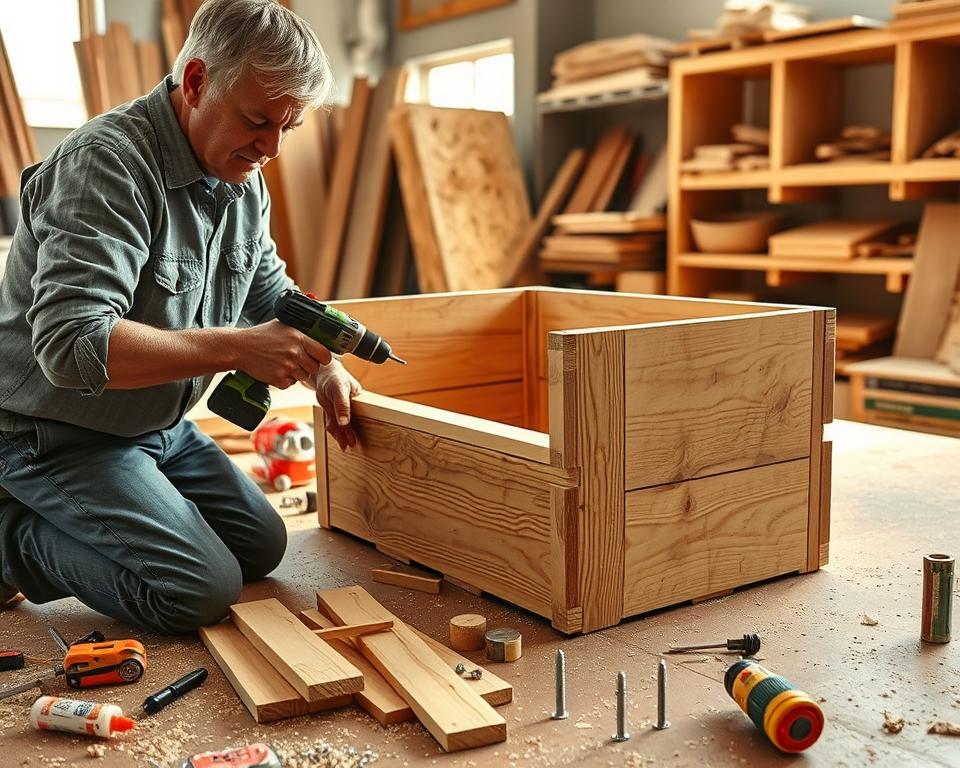
Putting together a wooden planter box can be a fun project for those who like to build things themselves. With easy instructions, you can make your yard look better. This guide will help you build a strong planter that lasts many years.
Step-by-Step Assembly Guide
Start by getting all your wood pieces ready, checking for any flaws. Here are the steps to put it together:
- Align the Base: Put the bottom board on a flat surface. This is the start of your planter.
- Attach the Sides: Place the side boards upright against the base. Use clamps to keep them steady while you attach them.
- Use Fasteners: Screw the sides to the base with wood screws. Make sure to use at least three screws on each side for a firm hold.
- Install Corner Brackets: To make the corners stronger, add metal brackets. This helps the planter last longer.
- Add the Top Frame: For a nicer look and better function, you can add boards across the top.
Essential Fastening Techniques
It’s important to know how to fasten wood properly for projects like this. This makes sure your planter box stays together. Use these techniques:
- Wood Screws: They need to be at least 1.5 inches long. This ensures they go deep enough into the wood to hold it tight.
- Brackets: Metal brackets strengthen the corners and joints. They stop the parts from coming apart over time.
- Wood Glue: For extra strength, apply good wood glue at the joints before screwing them together.
Adding Drainage to Your Planter Box
When making a planter box, it’s key to think about water drainage. Plants need the right airflow and moisture around their roots. Without good drainage, water piles up, causing root problems and diseases. So, it’s crucial to use effective drainage methods. This ensures your plants will be healthy and happy.
Why Drainage Is Important
Plants need just the right amount of water – not too much. Too much water can kill the roots and make diseases more likely. Good drainage stops these issues. It lets extra water flow out, keeping soil perfect for roots. This means healthier plants.
Methods for Creating Drainage Holes
Here are a few ways to add drainage to planter boxes:
- Drilling Holes: Drill several holes in the bottom. Make sure they’re spaced out well.
- Gravel Layer: Put a layer of gravel at the bottom before the soil. It helps manage water.
- Drainage Pipe: For big boxes, a drainage pipe can move water away from roots.
- Screening: Cover the holes with landscaping fabric. It keeps soil in but lets water out.
Using these methods well means less water damage and healthier plants.
Finishing Touches for Your Planter Box
Adding the right final touches to your wood planter box can make it look better and last longer. It’s key to know that proper sanding and staining will reward you with a beautiful, durable piece. It’s also vital to protect wood planters from weather and water.
Sanding and Staining Options
By sanding and staining your planters, you do more than just make them look good. You also shield the wood from damage. Begin with thorough sanding to smooth out the surface. A smooth finish is a must. Then, apply a top-quality wood stain to bring out the wood’s natural patterns. Opt for stains that seal the surface to better resist water.
Water Sealants and Protection
To keep your planter box in good shape for a long time, think about using a water sealant on the stained surface. Sealants act as a guard, blocking moisture damage and keeping the color fresh. Make it a habit to inspect the sealant’s condition throughout the year; you might need to apply it again to keep up its defending features. This careful attention helps maintain both the look and the life of your planter box.
| Finishing Option | Benefits | Frequency of Application |
|---|---|---|
| Sanding | Creates a smooth surface | As needed, before staining |
| Staining | Enhances wood color and grain | Every 2-3 years |
| Sealant | Protects against moisture | Annually or as needed |
Planting in Your DIY Planter Box
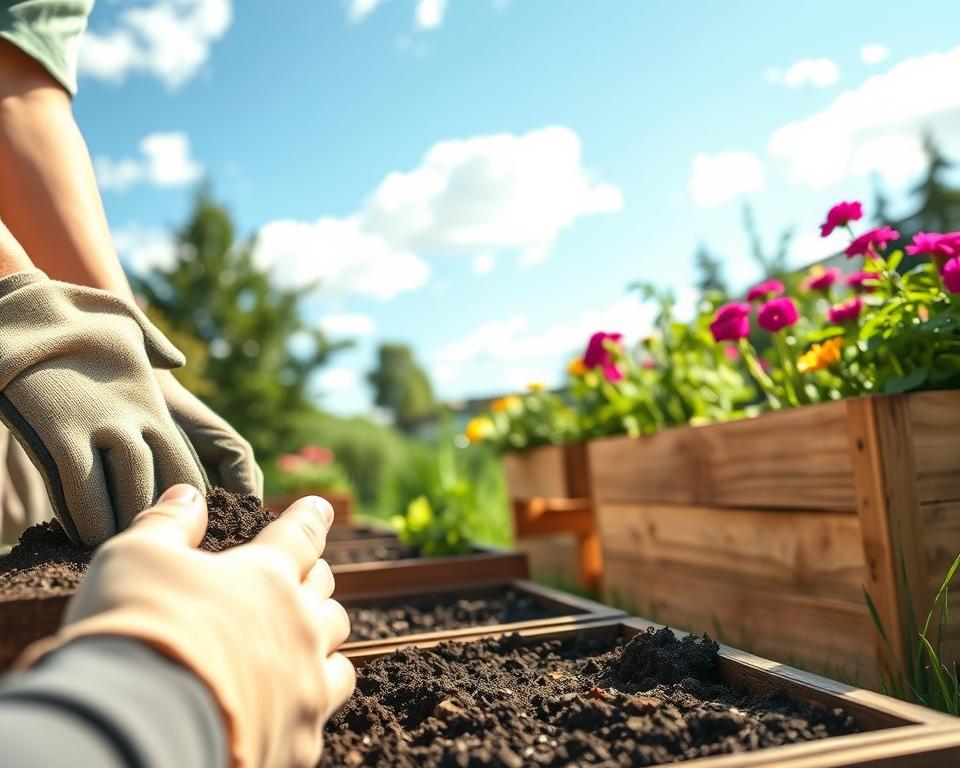
After finishing your wooden planter box, decide what you want to plant. Picking the right soil and plants is key for a great garden. This helps your garden grow well.
Soil Choices for Planter Boxes
The soil you pick is very important for your plants. For planters, choose soil that drains well but keeps moisture. A good potting mix has peat moss, compost, and perlite. This mix helps roots grow strong.
- Peat-based Potting Soil: It’s light and keeps moisture well.
- Coconut Coir: A green choice that also holds water.
- Compost Mix: Adds nutrients for better plant growth.
Best Plants for Wood Planter Boxes
Choosing the right plants for your wooden planters makes your garden look and perform better. Go for plants that do well in small spaces. Herbs grow well in such conditions. Some vegetables and flowers can also bring color and variety.
- Herbs: Basil, parsley, and cilantro are low-maintenance.
- Vegetables: Lettuce, tomatoes, and radishes fit well in planters.
- Ornamental Flowers: Petunias, marigolds, and geraniums brighten your garden.
Creative Customizations for Your Planter Box
Turning ordinary wood planter boxes into something special shows off your style. By using colorful paints and cool designs, you make a piece that’s both useful and beautiful. It can make your outdoor area look better.
Painting and Decorating Ideas
Using bright colors and patterns can make your planter boxes pop. Try stencils for neat designs or get a vintage look with layered paint. These creative planter ideas let your boxes shine and match your garden. Whether you pick bold or soft colors, the right paint makes your planter stand out.
Adding Legs or a Stand
Adding legs or a stand to your planters raises them up. It makes them easy to water and take care of. You can choose from rustic wood legs or modern metal stands to fit your garden’s style. This change is not just useful but also makes your planters look cooler.
Maintenance Tips for Wood Planter Boxes
Keeping your wood planter boxes in great condition takes regular care. You can enjoy your planters for many years with the right upkeep. We’ll guide you through essential tips to maintain your planter boxes. We’ll cover seasonal care and how to fix any damage.
Seasonal Maintenance Tasks
Each season requires certain steps to look after your planter boxes. Let’s go over the key seasonal care tasks:
- Check for any blocked drainage holes to ensure water can flow freely.
- Refresh your soil by mixing in compost or replacing it entirely.
- Inspect for any signs of wear, rot, or pests.
- Reapply wood sealant if necessary to protect against moisture damage.
- Trim back plants to encourage healthy growth and airflow.
Repairing and Refurbishing Your Planter Box
Even with great care, wear and tear can happen. Fixing wood planter boxes makes them last longer and look better. Here are steps to refresh your planters:
- Remove any decayed wood, replacing it with new, treated lumber.
- Sand down rough areas to avoid splinters and enhance appearance.
- Use wood glue or other adhesives for minor structural repairs.
- After repairs, apply a fresh coat of protective sealant.
Conclusion and Next Steps for DIY Enthusiasts
Finishing your DIY planter box project brings joy and pride. It’s more than gardening; it’s adding your special touch outdoors. Choose any design, simple or complex. By doing so, you start a fulfilling hobby. So, go ahead. Let your creativity shine in your next DIY garden project.
Want to learn more? Many woodworking resources are out there. Check out online tutorials, books, and workshops. Experienced DIYers share helpful tips there. These tips can improve your project and spark new ideas.
Starting with planter boxes is just your first step. You’ll learn skills for more woodworking projects. So, get your supplies ready and explore DIY gardening. Have fun building!