ADVERTISEMENT
Did you know over 70% of people feel calmer in bedrooms that show their style? The headboard sets the room’s mood. If you’re thinking of making a headboard yourself, you’ll love this guide! It gives you all you need to create a beautiful headboard. This adds a special touch to your room.
We’ll take you through each step, from picking materials to putting up your new headboard. This fun project will upgrade your room while saving money. Plus, it adds that personal flair to your bedroom.
Key Takeaways
- Headboard DIY projects can transform your bedroom’s aesthetic.
- Custom headboards are affordable and personal.
- This guide covers everything from materials to installation.
- Engaging in DIY furniture projects enhances creativity.
- You can build a headboard with basic tools and skills.
Introduction to Headboard DIY Projects
Making a custom headboard can really improve the look of your bedroom. It lets you add your own style without spending too much money. By making your headboard, you can match it to your room’s decor or add something new.
ADVERTISEMENT
Benefits of a Custom Headboard
DIY headboards save you money compared to buying one. They also let you be more creative, choosing your materials and design. This means you can create a standout piece that makes your bedroom look and feel better.
Popular Styles for DIY Headboards
There are many styles of DIY headboards, like upholstered, wooden, or even reclaimed materials. Each type allows for different ways to make it your own. Upholstered headboards add softness and color, wooden ones have a classic look, and reclaimed materials bring a touch of rustic charm.
Tools You’ll Need for the Job
To start making your headboard, you need the right tools. Essential tools include a staple gun, drill, saw, and measuring tools. Knowing how to use these tools makes the job easier, helping you bring your headboard idea to life.
Choosing Your Materials for a Headboard
Choosing the right materials is key for your DIY headboard project. There are many options, each suited to different styles, comfort levels, and needs. Let’s dive into wood versus upholstered headboards, eco-friendly choices, and ways to save money. This will help guide your decision.
Wood vs. Upholstered Options
Wood headboards are timeless and sturdy. They fit well with both classic and modern decor. Plus, they’re simple to keep clean. Upholstered headboards, however, add a soft and comfy feel. They’re great for reading or watching TV in bed. Your choice depends on what you prefer.
Eco-Friendly Material Ideas
For eco-conscious choices, think about reclaimed wood or ethical fabrics. Reclaimed wood reduces waste and adds uniqueness. Sustainable fabrics like organic cotton or recycled polyester make your headboard more eco-friendly. They also help keep the air in your room clean.
Budget-Friendly Choices
You can make a great headboard without spending a lot. Use plywood instead of solid wood to save money but still be sturdy. Look for fabric scraps at thrift stores for a unique upholstered look without the high cost. These tips can lead to a beautiful headboard on a budget.
| Material Type | Pros | Cons |
|---|---|---|
| Wood | Durable, easy to clean, classic look. | Can be heavy, may require finishing. |
| Upholstered | Comfortable, soft look, customizable fabric options. | May stain easily, requires more upkeep. |
| Reclaimed Wood | Environmentally friendly, unique character. | May need extra work to make safe. |
| Sustainable Fabrics | Healthier choice, eco-conscious. | Can be pricy depending on the fabric. |
Designing Your Headboard
Creating a headboard lets you make your bedroom more personal. Start by sketching out ideas, thinking about the right size and shape. These steps make your room more welcoming.
Drawing Your Design
Start with simple sketches of your headboard idea. Try out various shapes and styles, from classic looks to modern designs. Early sketches help you pick a style that matches your room’s vibe. Draw it from different sides to see how it fits with your bed and walls.
Understanding Size and Proportions
Before you decide on a design, think about the headboard’s size compared to your bed. A big headboard might overwhelm a small room. A small one might get lost in a big space. Choose a height that goes well with your bed. Here’s a guide to help you:
| Bed Size | Recommended Headboard Height | Width Proportion |
|---|---|---|
| Twin | 24-36 inches | 38-42 inches |
| Full | 36-48 inches | 54-58 inches |
| Queen | 48-60 inches | 60-64 inches |
| King | 60-72 inches | 76-80 inches |
Incorporating Personal Touches
Think about headboard details that show off your style. Pick colors and patterns that fit your room. Adding things like art, lights, or fabric can make it unique. Every special detail turns a simple headboard into a bold piece that says a lot about you.
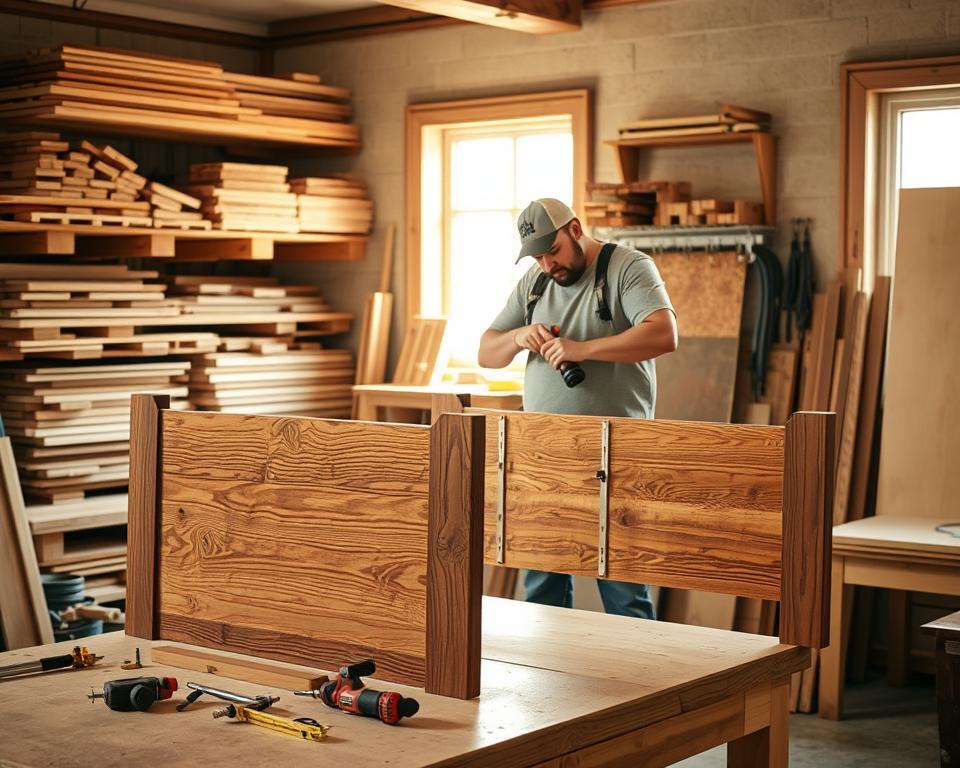
Step-by-Step Guide to Building a Wooden Headboard
Building a headboard by yourself is thrilling. It changes your bedroom’s look. Follow our guide to understand the steps. You’ll make a beautiful, strong headboard that makes your room better.
Preparing Your Wood
First, prepare your wood correctly. Choose high-quality lumber that fits your style. Then, follow these tips:
- Measure and cut the wood to your needed size.
- Sand the surfaces to make them smooth.
- Use a wood conditioner on softwoods for a better finish.
Assembly Instructions
Assembling your headboard is exciting. Here’s how to put it together:
- Place the wood pieces in order on a level surface.
- Glue the pieces together, and add screws or brackets.
- Check if everything is straight before the glue dries.
Finishing Touches
The final steps make your headboard shine. Try these finishing ideas:
- Sand it once more for extra smoothness.
- Paint or stain the wood in your chosen color.
- Apply a clear coat to protect your headboard.
How to Upholster Your Headboard
Upholstering your headboard can make your bedroom look amazing. You start by picking the right stuff like fabric and foam. Then, you learn some cool ways to cover the headboard so it looks neat. Putting on nailhead trim is a great final touch that makes it look really fancy.
Selecting Fabric and Foam
Choosing the right fabric for your headboard is key. You want something that looks good and lasts. You might like faux leather, velvet, or cotton blends. They each have their own cool features, like being easy to clean or feeling super soft. The thickness of the foam is also important. Thicker foam means more comfort but might make your headboard taller than you expected.
Techniques for Upholstering
First, spread your fabric out flat and put the headboard on top. Pull the fabric tight and staple it down smoothly. When you get to corners, fold the fabric nicely to avoid lumps. Some popular ways to make your headboard look awesome include French seams and blind stitches.
Adding Nailhead Trim
Adding nailhead trim really makes your headboard stand out. Mark where you want the trim, about an inch from the edge. Then, either glue or staple the trim on, keeping the nailheads evenly spaced. This fancy detail takes your headboard from simple to stylish.
| Fabric Type | Durability | Maintenance | Cost |
|---|---|---|---|
| Faux Leather | High | Easy to Clean | $30-$50 per yard |
| Velvet | Moderate | Vacuum Regularly | $40-$70 per yard |
| Cotton Blend | Low to Moderate | Spot Clean | $20-$30 per yard |
Painting and Staining Your DIY Headboard
Painting or staining your DIY headboard can make it the highlight of your room. It’s all about choosing the right techniques that match your room’s style. With the right prep, you can make your headboard look amazing. Here’s how to start.
Choosing the Right Paint and Stain
Finding the right paint or stain depends on your headboard’s style and material. DIYers often pick stain for wooden headboards to show off the wood’s beauty. For a uniform color, high-quality acrylic or latex paints are great. Always pick water-based options for an easier cleanup and safer environment.
Prep Work Before Painting
Good prep work is key for a stunning finish. Start by cleaning off any dust and grease. Sand the headboard lightly so the paint or stain sticks better. Use wood filler for any gaps or holes, and don’t skip the primer for painting. This prep work makes your headboard look good and last longer.
Tips for a Smooth Finish
To get a smooth finish, focus on small details. Choose the right brushes or rollers for the paint you’re using. Paint with thin, even layers for the best look. Let each coat dry well before adding another, and lightly sand in between. These steps help avoid drips and uneven spots.

Mounting and Securing Your Headboard
Getting your headboard fixed right not only makes your bedroom look good but also keeps it safe. It’s important to know which tools and methods are needed for a good setup. Here are some tips to help you attach your headboard securely and safely.
Tools Required for Mounting
You’ll need these tools to put up your headboard:
- Drill with drill bits
- Level to ensure straight alignment
- Screwdriver for secure fastening
- Measuring tape for precise height determination
- Stud finder to locate wall studs
- Wall anchors for added support
Finding the Right Height
Choosing the right spot for your headboard is key for a great look. The top of the headboard should be at or just above your mattress top. This makes everything look tied together. Be sure to measure carefully before you decide where to place the hardware.
Safety Tips for Installation
Keep safety first when putting up your headboard to avoid damaging it or getting hurt. Here are some safety tips:
- Always use a stud finder to locate wall studs for secure mounting.
- Wear safety goggles when drilling to protect your eyes from debris.
- Ensure all screws and anchors are tightly secured to prevent accidents.
- Have a second person assist with holding the headboard in place while you secure it.
Incorporating Storage into Your Headboard
A headboard with storage not only makes your bedroom look better but is also practical. It helps you organize better and use small spaces wisely. Let’s look at smart ways to add storage to your headboard.
Ideas for Functional Storage
There are many smart ways to add storage to your headboard. Here are some favorites:
- Shelves: Open shelves are perfect for showing off books or decor, making them easy to grab.
- Cabinets: Small cabinets help keep personal things out of sight, helping your room stay neat.
- Built-in Lighting: Adding lights improves your room’s look and is useful too.
Building Shelves or Cabinets
Creating storage shelves in your headboard is a fun project. Choose materials that go with your room. Make sure to measure so everything fits nicely. Putting shelves above or next to the headboard improves both the look and usefulness of your room.
Pros and Cons of Integrated Storage
Let’s weigh the good and bad of having storage in your headboard:
| Pros | Cons |
|---|---|
| Maximizes space and reduces clutter | May take more time to build |
| Offers customizable options | Hard to move after setting up |
| Increases your bedroom’s use | Could make design tricky if not well thought out |
Decorating Your Headboard
Making your headboard the center of attention is easy with fun decoration ideas that make your bedroom look great. You can add special touches to your headboard to make it stand out. Try different decorations like lights, art, and seasonal items to keep your bedroom exciting.
Accessorizing with Lighting
Adding lights can totally change how your bedroom feels. You could put sconces next to your headboard for reading light. They look classy too. Hanging string lights adds a playful, cozy feel. A floor lamp near the headboard also brightens the room. Pick lights that match your headboard for a unified style.
Using Art and Décor to Enhance Look
Putting art behind your headboard makes a bold statement. Use a big painting or several small ones together. Mirrors can make the room look bigger by reflecting light. Decorative pillows should match your room’s colors. Mixing different textures and designs makes your bed look welcoming.
Seasonal Decoration Ideas
Change your headboard’s look with the seasons to make your bedroom always feel new. In winter, add soft throws and choose warm colors. Spring is great for flower designs and light fabrics. For summer, pick bright and breezy decors. Autumn welcomes earthy shades and textures. This way, your bedroom always feels fresh.
| Season | Headboard Decoration Ideas | Color Palette |
|---|---|---|
| Winter | Warm throws, cozy textures | Deep reds, creams, and browns |
| Spring | Floral fabrics, light pillows | Pastels, greens, and blues |
| Summer | Bright textures, airy linens | Yellows, whites, and vivid patterns |
| Autumn | Earthy tones, woven materials | Oranges, golds, and browns |
Trying out these decoration ideas can make your headboard unique and show off your personal style.
Troubleshooting Common DIY Headboard Issues
Making your own headboard is fulfilling, yet you might face some bumps. Knowing how to DIY headboard troubleshoot saves time and keeps your headboard the star of your room. Let’s look at typical problems and their fixes.
Issues with Stability
Stability issues with headboards often mean they wobble. This happens if they’re not tightly connected or have weak spots. First, inspect how the headboard and bed frame are linked. Make sure to tighten any screws. Adding more support, like L-brackets, can make it more stable. If it’s a wall-mounted headboard, it must be firmly fixed to the wall.
Managing Squeaks and Noises
Nighttime squeaks can be annoying. They usually occur when parts rub together. To lessen the noise, you can use silicone spray or furniture wax on the joints. Furthermore, placing felt pads under the headboard legs can also quieten movement sounds.
Repairing Scuffs and Damage
As time goes by, your headboard might show signs of wear like scuffs or scratches. To fix headboard damage, use wood filler for wooden headboards or fabric patches for upholstered ones. Sand and repaint wood as necessary. For fabric headboards, clean them with a suitable upholstery cleaner. This keeps them looking good.
Conclusion and Final Tips for Your Headboard DIY
As you finish your DIY headboard, reflect on the journey. Think of the challenges and the skills you’ve gained. Your unique touch has made your space special.
Feel free to try new designs and materials. This part is exciting! Let your creativity shine and discover what you love. Use your new knowledge to keep innovating.
If you want to learn more about DIY furniture projects, plenty of resources are available. Look for books and online tutorials to inspire you. The world of DIY is endless, with your imagination as the only boundary!